Showing posts with label diy. Show all posts

Sunday, May 5, 2013

A little Pinspiration: Inexpensive and Easy Kitchen Wall Art

My husband and I are major DIYers when it comes to updating our home. We recently began to tackle the first half of our kitchen.  Here is a quick peek of what it looked like before...


Need I say more of why we wanted to tackle this?

My husband's grandfather built this house in 1951 and we were lucky enough to be looking to purchase a home at the right time to be able to keep this lovely home in the family :) When you look back at pictures of family events here in the 70's, sadly it pretty much looks exactly the same. Our family spends a lot of time in this room whether it be meals together, playing games, baking, art projects, homework, etc.. and I just hit a point where I could not look at paneling on top of paneling anymore. So...
Paneling came down, Sheetrock went up, walls got spackled, primed, and painted and here is the result...

I am IN LOVE with retro inspired aqua and red kitchens, but knowing myself and realizing I have painted some rooms approximately 3-5 times in the 8 years we have lived here :) I knew I couldn't go as bold as aqua or red walls. So I picked a neutral wall color (Benjamin Moore-Shaker Beige) and decided I would add the pops of red and aqua as accents so that way if I ever stopped being IN LOVE with retro (highly unlikely) I could easily make the changes without repainting :)  [Side note: Smitten with my red door]

This weekend was absolutely beautiful and my daughter unfortunately has had a cold/fever thing going on so I thought what could be better than doing a little art project when you are stuck at home? Whenever I need a bit of inspiration I head on over to Pinterest and this time I found this lovely gem of an idea for wall art from Homespun With Love (click link for DIY directions-)...

Homespun with Love

Could it get any better than black and white vintage prints and red frames?! The only way I could see was by adding some touch of aqua. I headed over to Michael's and to my luck the frames were 40% off!!, add some paint (we used acrylic paint not spray paint like directions say), and brushes to my order and you have an under $20 for 4 frames art project, SWEET!

Here is a peek at our finished project...


I could not be happier with the final outcome. The perfect touch of retro and a great day out in the sunshine painting with my little girl.

Hope this brings some inspiration in to your home :)

<3 Kris

Thursday, August 9, 2012

A Handmade Christmas: Ballerina Doll

These last few months I have really been working on living a simpler life as a family. Putting our energy into what we find important and not what other people tell us is important. One area that I am working on with my kiddos is that "Momma doesn't need to buy you everything you see." In the past my husband and I have agreed to disagree in this department. I admit it..I was a spoiler and my husband well not so much.  In these last few months I have really done a 180 in attitude change on this topic and completely agree with my hubby. Our kids currently have more toys than a lot of kids I know, not just due to me but they also have a grandma and an auntie that love to spoil too ;) Having sooo many toys, I feel takes away that something special each toy holds.

My attitude change brought up a question to myself; "Whatever happened to simple, imaginative fun?" When I was a kid my brother, sister, and I used to pretend that our swingset was an obstacle course that we had to get across, it was so much fun. I got a couple of stitches from it but it was a blast! I used to wheel around this old little shopping cart and pretend nature was my grocery store. Leaves were steak, sticks were fruits and vegetables, and hands down this grocery store had the most beautiful flower arrangements. My sis and I would sit in mom's hosta garden by the driveway and create little homes in the hostas for our My Little Ponies and Glo-Worms.  [Daydreaming down memory lane] :) 

I want that for my kids. I want their creativity and imagination to take the spot/need of wanting "things". Seeing them run around the backyard, letting their imaginations take them away just brings me so much happiness. Last night Abby was a cowgirl and she was warning the town folk to watch out because Old Man Luke was back in town. She would warn them by "yodeling" <3

With this want for simpler came the goal to make this Christmas for my kids a complete no store bought Handmade Christmas. I am not making other family members give them a handmade Christmas, but as far as my husband and I, our gifts to everyone are going to be handmade this year. They are both still young enough that whatever momma or daddy makes is special. I hope by having a Christmas like this it will begin to instill in them that toys and presents don't need to come from a store for them to be awesome, fun, and special.

I just completed my first handmade present. Yay! This one is for my little dancing cowgirl Abby. I found this wonderful softie and doll pattern shop called Dolls and Daydreams. The owner Sarah is the biggest sweetheart around and her patterns are absolutely adorable. She has so many to choose from that it was hard to decide, but I absolutely fell in love with her Ballerina Pattern and knew it would be the perfect doll to make Abby for Christmas. Her instructions were easy to follow and the doll itself was surprisingly really easy to make. If you have some sewing experience you are good to go! 

Meet Amelia the Ballerina. I gave her red hair of course :) and prettied her up with different shades of pink since Abby tells me her favorite color is no longer purple but now pink. 

Let me just warn you...doll making is addicting! I am contemplating on selling some in my recently reopened handmade shop Abby's Attic  because her patterns are just so much fun and easy to create. I have been checking out her other patterns to see what I should make next. I am thinking a pirate doll for Luke. 

Have any of you guys had a Handmade Christmas? What was your favorite handmade item you ever received?  Mine was a beautiful topsy turvy doll my mom made me one year. I remember playing with her all the time.

<3 Kris


Tuesday, July 24, 2012

Up and Running on YouTube


I have been brainstorming for a while on what I could do to add to the awesomeness of what Fabric Nerds has to offer. After talking with a couple of friends and running around some ideas, I came up with what I think is a great addition to the Fabric Nerds website...YouTube Tutorials! 
After getting over my camera shyness :) and figuring out how to take a video and semi edit a video, I came up with my first tutorial. The first tutorial is on how to make quick and easy Fabric Braided Coasters. It is a perfect project for all those scrap fabric pieces you have lying around that you don't have the heart to throw out but they are not big enough to do any of your projects in mind. They would make awesome gifts for a house warming party, Christmas, etc... when given as a set. They are quick, super easy, and one of those projects I just love because the color combination possibilities are endless.
Here is a sneak peak of what mine came out like...


Well I hope you like it. Bare with me through these first couple of videos as I try to learn the art of movie making :)

<3 Kris


Thursday, July 12, 2012

Easy Peasy PJ Pants

This past Father's Day (or as my daughter calls it Daddy's Day) we decided to go on our first family camping trip. To make it a little extra special I thought I would whip up some camping pj's for the munchkins. My kiddos are 21 months and 4 years old, so anything Momma makes them is always awesome :) I did some searching on Pinterest and found a super easy tutorial at this awesome blog, My Cotton Creations. Her photo tutorial has great detail and is really easy to follow. I whipped up these pj pants in no time! Just a bit of a warning once you realize who easy they are to make you might decide to stop buying pj pants and making everyone you know a pair :)

Here are some photos of the kiddos modeling their pj pants on our camping trip...
All the fabrics you see in the pj pants can be purchased at Fabric Nerds. For my daughter's pants I used Daisy Cottage Main Print and Fly a Kite Yellow Gingham (for ruffles seen in first pic). For my son's pants I used the picnic print from the Crabtastic Line. 


A HUGE ONE DAY SALE at FABRIC NERDS is coming up next Friday, July 20th. I am celebrating something BIG and wanted to celebrate BIG with all of you. Stay tuned during the week for more details on this BIG event.


Monday, June 11, 2012

DIY Photo Canvas

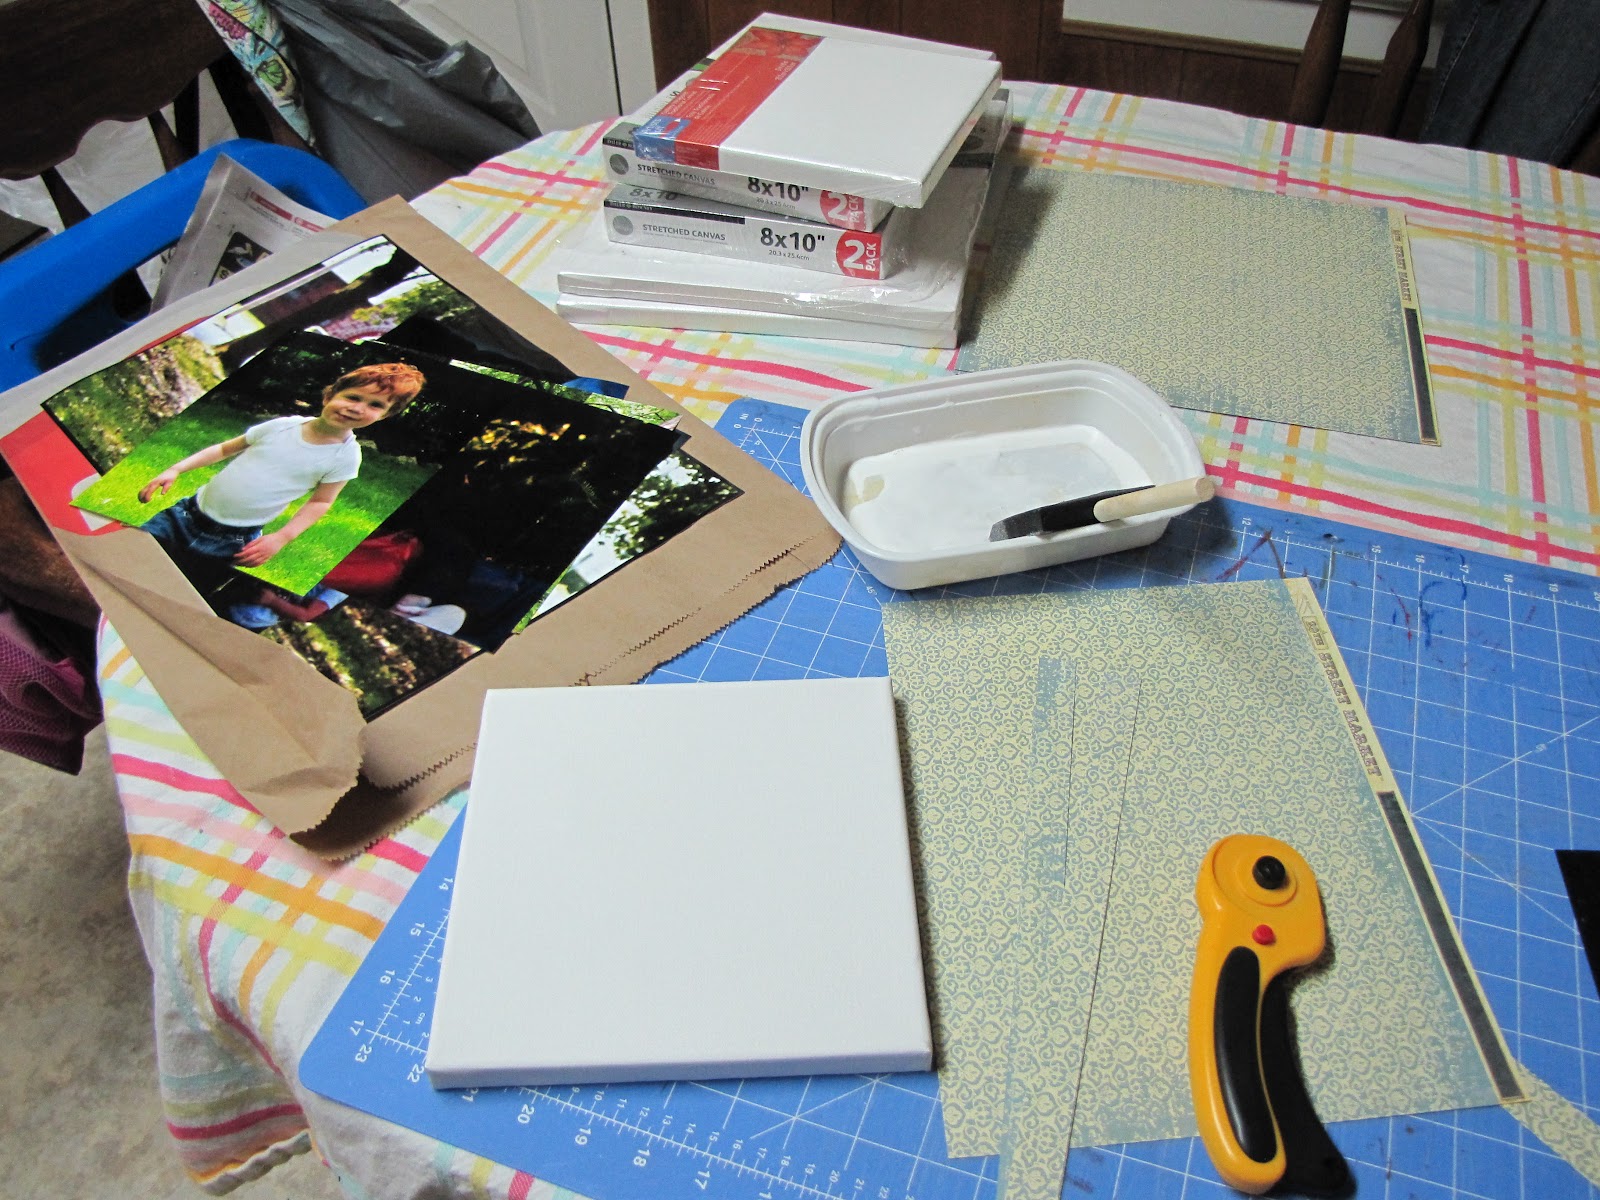
This past Friday night I had the joy of a quiet night alone (hubby had a guys night & kids asleep) so I decided to have a Crafty Mama Night, got a Mike's Strawberry Lemonade, put on some Gretchen Wilson, and conquered a pile of crafting supplies. My outcome...


I must say I am so completely happy with how it turned out! We redid our living room about a year ago but our walls for the most part were still bare. I love how this canvas wall adds some color to our walls and but more importantly shows what this room is about... our family. It's where we play games, watch movies, build blanket tents, and just be together as a family.

So getting to what you all want to know. How did you do it? Well for starters my inspiration comes from Pinterest (of course). Pinterest showed so many different ways on how to make your own canvases but fell in love with this one over at Girl. Inspired. She also has a tutorial if you want to check out hers. But here is mine:

These are a quick, fun, and easy way to decorate your house. I now want to make more for presents. The best part though...the cost! Here is my total:

1 hr Photos Printed ( One-11x14"  Six-8x10"  Four 5x7") =$32.00 
Canvases= $30.00 (Michaels at 40% off and had a 20% off entire purchase coupon)
Mod Podge = $4.50
Brushes = FREE (already had)
Scrapbook Paper = $3.00 (Michaels)
Brown Paint = FREE (already had)

Grand Total= $69.50 
Which is around the cost of One 11x14" professional canvas and I made 11!!! 

Supplies Needed:

Printer Paper
Tape
Mod Podge (Matte)
Blank Canvases (try to get ones with flat sides without folds, makes life easier when modge podging)
Scrapbook Paper
Paint in your choice of color
Foam brushes
Photos
Rotary Cutter or whatever you prefer for cutting straight
Straight Edge Ruler

Steps:

1. Take your printer paper and cut to the size of the canvases you will be creating. Tape them on the wall to get the idea of the layout you want. This was my layout...


2. Get all your supplies and and start to cut strips of your scrapbook paper into the width and length of the sides of your canvas (Note: Cutting the paper just a bit thinner than the width and shorter than the length I found worked better)

3. Once you have your strips cut for your first canvas, brush the Mod Podge along the sides and glue on your strips. Once your strips are glued on apply Mod Podge to the front of your canvas and glue your photo on. 

4. Allow to dry completely (approx 30 mins). Once canvas is dry, apply a coat of Mod Podge over the entire picture and sides. (Do not worry Mod Podge dries clear)

5. Once your canvas has completely dried take your paint color of choice and "antique" sides and corners with your foam brush. This step helps to hide the seam between the photo and the scrapbook paper while adding character to the photo. 

Made a little mistake with the paint? No problem! Since the Mod Podge has dried completely, if you make a little mistake a damp cloth easily takes the paint right off


And remember that DIY projects are not to reach for perfection, but instead to try something new and have a little fun!

Happy Monday!
<3 Kris


Friday, February 3, 2012

My Little Artist

My little girl absolutely loves all things art (a girl after my own heart). She absolutely loves to draw and paint, especially when it comes to making serious silly pictures of her mommy and daddy. This past December she moved upstairs to her very own "big girl" room and I knew that I wanted to make a special place to display her beautiful works of art. I was thinking picture frames, cork board, magnetic strips but nothing ever came together in my head. Thank goodness for Pinterest and Ikea. At Ikea I found a cute little hanging rack and knew it would be perfect for holding her crayons, scissors, glue sticks, markers, and other art supplies and then on Pinterest I found an awesome way to use an oil drip pan. Make a few buttons in to magnets and a cute kid sign about being an artist and the outcome....


A super easy diy home decor project. You could make it into a family command center, chore chart, office calendar, or magnetic toy for kids to learn their alphabet and words. The possibilities are endless with this one. 

Want to make one of your own? Here is how I did it...

Materials:
Oil Drip Tray ($9 Walmart)
Fun Buttons (Walmart)
Children Art (Children Inspire Design)
Command Hanging Strips (Walmart)
Hanging Rack (Ikea)
Containers (Ikea)
Super Strength Magnets (Etsy)
Super Glue
Metal File
Snips
Double Sided Sticky Tape
Laminate Sheets (Optional)

To hang drip tray follow the directions on the back of the Command Hanging Strips. I then used a laminating sheet and laminated the Children's Art and stuck it on to the drip tray using double sided tape. I snipped the back of each button off and filed them down so the backs were flat and super glued the magnets to the back (let magnets stand for about 30 mins before using). Finally I attached the hanging rack by just using magnets and it holds up nicely even with markers and crayons in the containers and voila your little munchkin has a great "art studio" to share their creativity with everyone! 

What did I tell ya, Super easy right?!

<3